Today, I made a few sun-catcher sensory bags so that the girls could explore color, texture, and light.

These sensory bags are very easy to make and allow kids to explore in all sorts of ways. Rosie and Jewel explored color mixing, light, texture, and reviewed the alphabet with a bit of sensory writing. The best part is once they were done there was NO MESS or clean up.
Sun-catcher Sensory Bag Materials
- Zip seal bags
- Hair gel
- Food coloring or washable watercolors
- Packaging tape
Instructions
- Fill a zip seal bag with the desired amount of hair gel. I used a 14 oz bottle of gel for each large zip seal bag. Add several drops of food coloring. Then squeeze the air from the bag and seal it. If you want to make color mixing sensory bags like we did you will want to add one food coloring color to one side of the bag and another food coloring color to the other side of the bag.

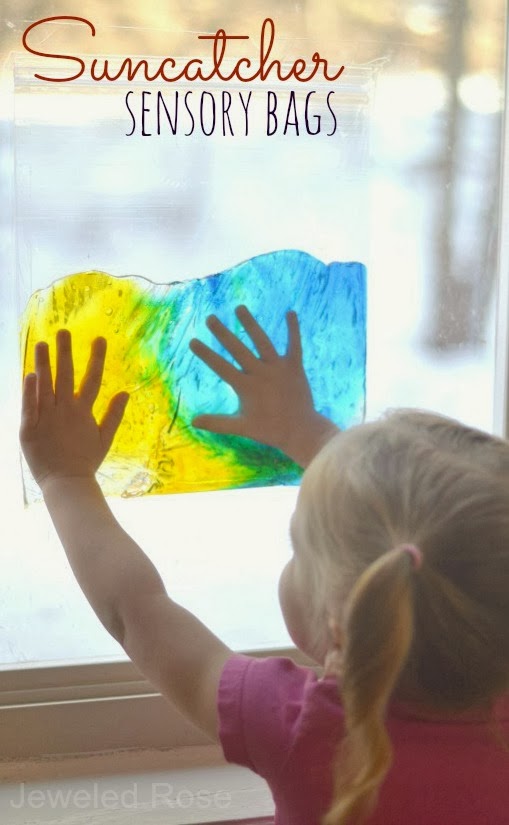
- Blue and yellow food coloring will combine to make green as kids play. Red and yellow will make orange and red and blue will make purple. Once the bag is sealed use packaging tape (or similar) to secure the sensory bag(s) to a window at kids level. Not only does the tape hold the sensory bag to the window, but it also super seals the bag so there is no leaking.
- As kids play the coloring will mix into the gel, creating a beautiful sun catcher effect. The more they play the more beautiful the sensory bags become.

Rosie and Jewel had so much fun squishing and mixing their sensory bags. As they played we talked about what colors they were making and what colors were combining to create the new colors. We also looked at the sensory bags from different angles to see what angle best captured the light from the sun.


After a bit of free play and exploration I prompted the girls to try a bit of sensory writing. This can be done with fingers, but to add a bit more fine motor to the fun I gave the girls q-tips. I would say a letter and they would then draw it in the gel.


Once they were done drawing a letter we just squished the gel around to erase it. We then had the perfect space to draw another. Rosie especially loved this.
I left our sun-catcher sensory bags hanging in the window all day and the girls returned to play with them often. After several days of play I transformed our sensory bags into another activity. Connect with Growing a Jeweled Rose on Pinterest and Facebook so you don't miss what we came up with or any of the fun kid activities we share.
I left our sun-catcher sensory bags hanging in the window all day and the girls returned to play with them often. After several days of play I transformed our sensory bags into another activity. Connect with Growing a Jeweled Rose on Pinterest and Facebook so you don't miss what we came up with or any of the fun kid activities we share.